
Understanding Nuxt 3 - Part II

Roxi
Front-end Developer
Reading time: 7 min
Updated: Jul 2, 2026
Key takeaways
- Nuxt 3 offers three ways to manage state: ref() and reactive() from the Reactivity API, the useState composable, and the Pinia library.
- A plain ref/reactive store works client-side but struggles with server-side rendering because of state hydration.
- The useState composable gives you SSR-friendly shared state through a simple key-based system, without prop drilling.
- Pinia is the official Vue state management library, with stores, getters, actions, and Vue DevTools support for larger apps.
- Choose by complexity: ref and useState suit simple sites and landing pages, while Pinia fits apps with logins and complex logic. These patterns carry over to Nuxt 4, now the current stable release.
In the first part of this series, we covered the major differences between the Composition API and the Options API and how the Reactivity API works in Nuxt 3. Now it's time to talk about state management. This concept builds on the features we discussed before. So if you haven't read the first part yet, now's the time.
A quick note on versions. Nuxt 4 is now the current stable release, and Nuxt 3 has entered maintenance mode. The state management patterns below still apply, because Nuxt 4 builds on the same foundations. For the latest details, always check the official Nuxt documentation.
State management in Nuxt 3
The variables we declare in a component are only available in that component's scope. But real apps often need to share variables across components, functions, or pages. Since we already covered composables and reactive data, I'll show three ways to handle state management in a Nuxt 3 app. First, let's see how the Reactivity API can do it.
A. Ref() and Reactive()


Now whenever the store object is mutated, any component that imports it updates its views automatically. So we have a single source of truth.
This also means any component that imports the store can mutate it freely. To stop the global state from being changed at random, it's best to define methods on the store with names that express the intent of each action.

The ref() and reactive() functions can manage state in client-side apps. But if you build a web application that uses server-side rendering (SSR), this pattern brings challenges, including state hydration.
With server-side rendering in Nuxt, the app first runs on the server to generate the initial HTML. There's a good chance one or more refs are used during that setup. Once the app boots on the client, though, none of those variables are set. So we have to run the setup code again to work out their values.
This is where hydration comes in. We take the state we already computed on the server and send it with the app's HTML, CSS, and other assets. Then, instead of recalculating everything, we pick up where we left off.
Sadly, ref and reactive can't do this for us. Usually that's fine. It only becomes an issue when your ref relies on server state, such as a request header or data fetched during server rendering.
B. The useState composable
That's why Nuxt provides the useState composable. It creates a reactive, SSR-friendly shared state across components. When Nuxt renders a page, it stores all the state used by useState and sends it to the client. When the client boots, it hydrates that state back in, restarting every piece of state that used useState.
The useState composable isn't a full state management library. It lets you share state with a simple key-based system. That helps you avoid prop drilling and heavy use of events.

As apps grow larger and more complex, so does the state. A flat state with basic keys stops making sense. That's why Pinia, the official Vue state management library, is a must-learn, just like its older sibling Vuex.
C. Pinia
Pinia offers a better developer experience than Nuxt's useState. It adds features you'll likely need as your app grows. A stubborn developer could build the same things without it. But there's no need to reinvent the wheel when the Vue team already did. Here are the features Pinia brings:
- Stores to organise your state.
- Integration with Vue DevTools, including in-component inspection and time-travel debugging.
- Modifying stores without reloading your page.
- Actions and getters for easier updating and reading of state.
- No explicit mutations, since all changes are implicit.
Let's look at how to define a store with Pinia in Nuxt 3.

First, define the store with Pinia's defineStore function. It takes two arguments. The first is the store name, which Pinia uses to connect to the DevTools. The second is either a setup function (example above) or an Options API object (below).

Think of state as the store's data, getters as its computed properties, and actions as its methods. Option stores are more intuitive. They give you a skeleton that's easier to work with.
The setup function version is less verbose and more concise. In it:
- ref()s become state properties.
- computed() functions become getters.
- function()s become actions.
Now that you know all three ways to handle state management in Nuxt 3, the common question is which one to choose.
Source: Nuxt 3 State Management: Pinia vs useState
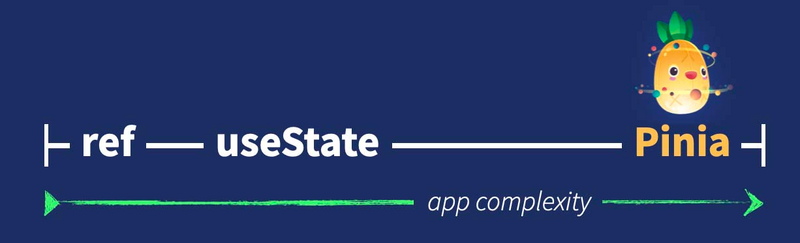
It comes down to app complexity. Ref() and useState are enough for a simple site or a landing page. Pinia is the go-to for a web app where users log in and do more complex operations.
Hands-on: build a Nuxt 3 app
In this article, I wanted to cover the very basics of what Nuxt 3 brings. Keep in mind it has many more features. I strongly recommend starting with the official Vue and Nuxt docs before you write code. But if you're impatient and like to dig into code first, like me, here are the steps to a fresh Nuxt 3 app with Pinia. Run npx nuxi init nuxt-3-demo to set up a new project with no dependencies installed. Then move into the project with cd nuxt-3-demo and install the dependencies with yarn install. Now start the dev server with yarn dev.
If you know Nuxt 2, you'll notice the Nuxt 3 project structure is simpler. You add the folders you need, rather than having everything and enabling it with a file.
This means Nuxt 3 is much smaller and skips the router by default. There's also no pages folder by default. When you add a pages folder and put a file inside, Nuxt builds the router for you. If you only have one page, such as a landing page, you may not need the pages folder. So this is the directory structure you'll see after running the commands above.

The app.vue file is the entry point of the app and acts as the index page.
Before adding pages, we adapt app.vue by replacing the <NuxtWelcome /> starter component with <NuxtPage>. This built-in component ships with Nuxt and is needed to display top-level or nested pages from the pages/ directory.
Then run npx nuxi add page about. Watch how Nuxi, the new Nuxt CLI, creates the pages folder with an about.vue file and boilerplate code. Easy as one, two, three.
Now visit http://localhost:3000/about and you'll see it. Try the index page at http://localhost:3000/, though, and you'll get a 404 error. That's because you don't have an index.vue file in your pages folder yet. So run npx nuxi add page index to add it.
Next, add Pinia to your project with yarn add @pinia/nuxt. The only change you need is to add '@pinia/nuxt' to your modules list in the nuxt.config.ts file. And you're good to go.
Conclusion
Now that we've gone through both parts and set up a Nuxt 3 app from scratch, the fundamentals are set. What's next is to get creative and play with the Nuxt modules of your choice. That's how you add more complex features to the demo site.
If you need to migrate a complex Nuxt 2 app to Nuxt 3, I recommend reading this great migration guide first.
In the end, I find Nuxt 3 and Vue 3 exciting to learn, despite the big changes. What's even better is that the Vue core team encourages the Composition API but doesn't force it. You're free to stick with the Options API if that feels more comfortable. Later, once you have a good grip and built your first website, you can challenge yourself to refactor it with the Composition API.
Want a team that ships production-grade Nuxt and Vue apps? Explore our Nuxt.js development and Vue.js development services, or see how our web development team works. Thank you for reading.